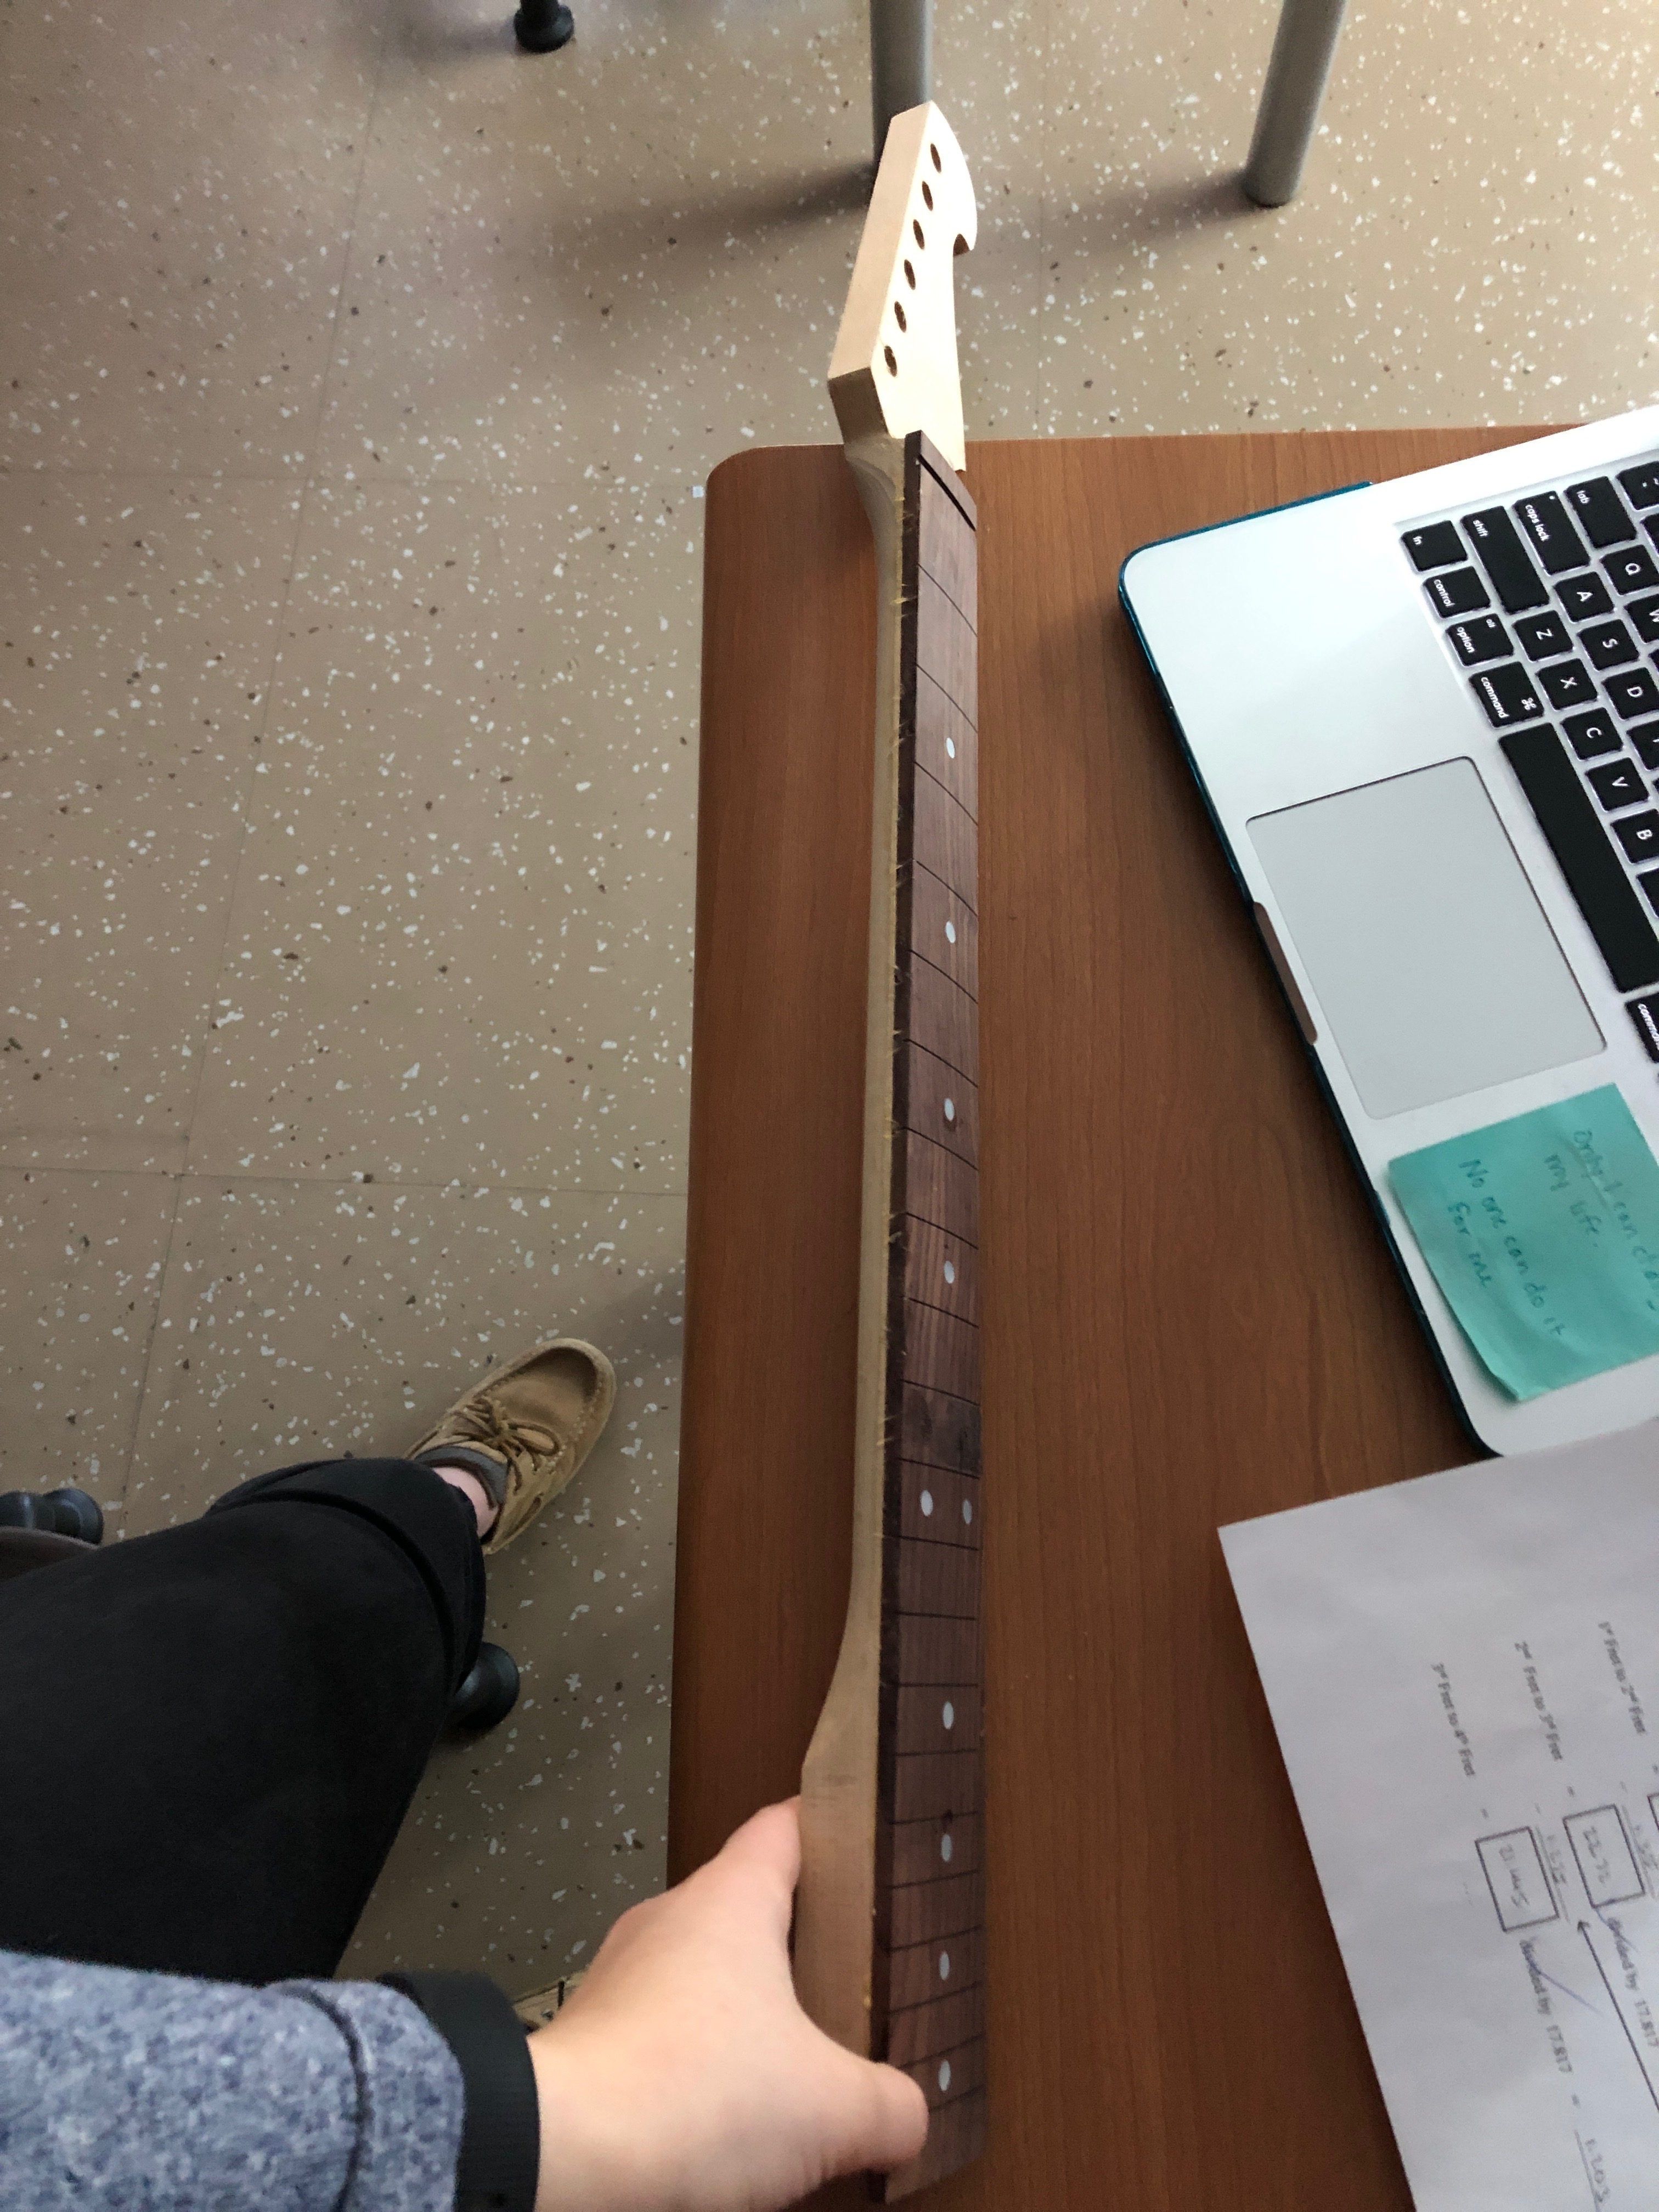
Accomplishments: This week I finished filling in the drilled hole with more paste made from the fingerboard powder and wood glue then sanded the 11th fret so that it was more flush with the face of the board. I also glued my fingerboard to my neck with Mr. McCormack. We started out by placing the truss rod into its slot (which lies under the fingerboard and in the center of the neck) and then put two nails on both ends of the face of the neck and cutting them to that just a little bit was coming out of the wood. We then Placed the fingerboard on the neck to make little groves indented in on the back of the fingerboard. Then, we covered the truss rob it with blue painters tape so that we didn’t get any glue on it. Next, we spread glue along the flat surface of the neck so that glue was covering it all except that part by the tape. After we removed the tape we lined the fingerboard back up and placed it in the grooves we previously made to make sure it would stay in place. With a long rubber band, we wrapped the neck in a candy cane like pattern up and down the neck to secure the frame and to let it dry overnight. We wanted the glue to squeeze out so that we knew that the fingerboard would be tight to the neck
Tools: Nails, wood glue, rubber band, fingerboard dust, sanding block
Learned: There are 12 semi-tones to 1 octave, a capo changes the scale length of the instrument
